How to Grill Like a Pro
Jul 07, 2022
Whether you’ve grilled steak or meat a few times or you’re a first-timer, we’ll teach you how to grill like a pro! We’ll run you through the basics in this ultimate guide to grilling. Also, we sure have a few tricks up our sleeves (we were going to pull them up for the job anyway). So, tag along if you want to have the best grilling experience.

How to Grill Like a Pro: The 6 Steps to Grilling
Let’s get right into business with these 6 steps for grilling.
1. Understand Your Grill Type
We’ll help you identify how your grill functions. Is it an electric, liquid propane, gas, or charcoal grill?

Needless to say, if it has cords and needs plugging, it’s an electric grill. If not, check beneath the grilling unit for a tank; that’d make it a propane grill, extracted from natural gas.
TIP: Keep an extra propane tank in case you run out of cooking gas.
Is your grill neither electric nor propane? It might be a gas grill. The face’s buttons and knobs should tip you off. Both propane and gas grills are very convenient.
Finally, a basic grill with none of these is probably a charcoal grill, which is fun and versatile when it comes to coal arrangements. Charcoal grills give you that authentic taste you associate with BBQing and yield high temperatures!
TIP: Be sure to keep extra charcoal in a dry place.
2. Prep Your Grill
If your grill is dirty, you have to clean it. Cooking on an unclean charcoal grill will be difficult because debris and ashes block its vents. Accordingly, you’ll struggle a lot with controlling the hot fire.
You should season your grill grates if you want a non-stick cooking surface. But if you’re lucky and have porcelain/coated or pre-seasoned grates, skip right to the next step!
For the rest of us, we may apply a thin canola or grapeseed oil layer to the grates. You can trim excess fat with a paper towel so that it doesn’t cause buildup. Try folding a paper towel to make it the size of a grill brush, soaking it with oil, and brushing it over the grates evenly.

TIP: Another way to clean your grid is to rub it with half an onion, this should get rid of any remnants of the last BBQ without having to rinse the grid of any soapy residue!
3. Preheat Your Grill
Preheating your grill lets the flames die down before the BBQing starts. So, turn up the heat source, but don’t make it so hot that you can’t stand by the grill. Here’s how to work each grill type:
Electric Grill
Electric grills are super easy to turn on. You plug the cords and turn its knob to high, and you’re good to go! Now, close the lid, and give the grill some time to get to the needed temperature.
Propane or Gas Grill

- With propane and gas grills, a valve permits the fuel source into them, which you’ll find at the tank’s top.
- Turn the valve counterclockwise to open it.
- Press the ignitor button, and hold it until you hear a clicking and whoosh sound.
- Release the ignitor button.
- Leave the gas grill for 10 to 15 minutes (with the lid closed).
When you think of gas BBQ vs. charcoal BBQ, you shouldn’t expect gas grills to yield a temperature as high as charcoal ones. Still, what we like about gas grilling is that you can easily monitor and control the heat via the temperature dials.
Charcoal Grill
If you have a charcoal BBQ, you can use a chimney starter to light charcoal with fewer chemicals and a better taste. However, if you don’t have one, a lighter fluid works as well.
- Make a charcoal pile at the center of the grill’s bottom grate.
- Add the lighter fluid to the coals (not too much, though), and light them instantly.
- Wait for them to develop a light gray ash layer (5 to 10 minutes).
- Spread the burning coals around for a medium fire, or add a second charcoal layer for a hot one. Now, they’re ready!
Since most or all the charcoal grills lack temperature control, you change their heat by tampering with the charcoal fire, vents, and cover. On the plus side, the rotisserie option some of them have is pretty cool!
TIP: Grilling accidents may make for fun stories to tell at family gatherings, but you should still read the safety instructions on charcoal and lighter fluid.
4. Prep the Meat
Get the meat out of the fridge, and store it at room temperature, which is known as tempering. This means that it will cook evenly once it hits the heat. Then, dry it with a kitchen towel to give it a decent crust.
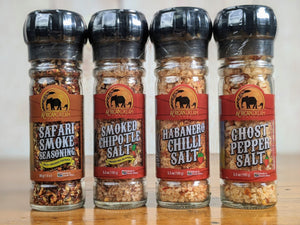
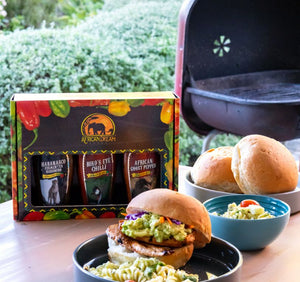
Now, you can use large amounts of Maldon sea salt (which isn’t too salty), pepper, herbs, spices, or any seasonings to taste. We aren’t trying to tell you what to do! But if you’re unsure about seasoning, you might want to check out this Grilling Master box with spicy salt and sauces.
Of course, the amount of seasoning varies according to the meat type you’re grilling. For instance, steak requires little seasoning.
Note that much of it will fall between the grill grates, so sprinkling spices generously is a good idea. It is also advised to season the meat about half an hour or more before it hits the grill, to give the seasonings a chance to sink in.
TIP: If you are planning a cookout and are wondering what meat is the king of BBQ, well brisket is your answer! But keep in mind that it takes much longer to cook than most meats so make sure to plan ahead!
5. Cook the Food
Now, it’s time to put that meat on the heat. Spread the pieces out so that oxygen can reach the charcoal if you’re using it.
Unfortunately, there’s no cheat sheet to BBQing (but we did try!); every meat type and thickness requires a different treatment. But don’t abandon your honorable quest of becoming a master griller just yet! We’ll give you tips about how to grill each meat type. So, skip to the one you want to learn how to grill like a pro.

Chicken
The beauty of grilling is that you can cook a whole chicken in under an hour! Are you wondering how to BBQ chicken? Let’s start with low heat and oiling the chicken.

As for coal arrangements, you can have a two-zone direct fire. Although that sounds like something a gamer would shout into their headset, it’s actually when you keep your hot coals over one side of the grill and only leave a few coal pieces on the other half. This way, the hot side will give the chicken a good sear, whereas the cooler side will cook it with its indirect heat.
Breasts
You’ve got to try this two-zone direct fire arrangement with boneless chicken breasts. Cook them for six minutes on each side for an Instagram-worthy sear. But watch the boneless meat; the last thing you want is to dry out the chicken.
Another arrangement for chicken, especially whole chickens, is the two-zone indirect fire. For this, you push coals to one side of the grill and leave the other one empty.
However, indirect heat means the chicken will take longer to cook. For instance, if you’re grilling the chicken breasts with their bones, give them 40 to 50 minutes of indirect heat and periodic flips. Also, cover the chicken to avoid drying it out.
Thighs, Wings, and Drumsticks

Keep the indirect heat arrangement because you’ll need it to BBQ the chicken thighs, wings, and drumsticks. Wings might take 20 to 30 minutes, but thighs and drumsticks might be 40 to 50 minutes with regular flipping. And that’s how you cook meat without making it dry!
TIP: Add marinade to the thighs and drumsticks before grilling or sauce throughout if you want people to swear by your grilled chicken.
Vegetables
Do you feel like your summer barbeque party won’t be complete without grilled vegetables? No worries, we’ll teach you how to BBQ corn and other veggies. You want to coat them in oil and turn them frequently. The goal is to get that perfect lightly charred look, so you should go for medium heat.
For one, you can grill unshucked corn for 30 minutes. You’ll know the corn is ready when the husk gets blackened.
Also, if you haven’t tried roasted peppers, you’re in for a treat. Grill them whole, and continue cooking until they have that blackened skin and delicious crust. When it cools down, peel the pepper. You can also store it in the freezer and pull it out when you want a grilled snack.

Another way to BBQ a pepper is chopping these sweet veggies up. You want them in 1/2-inch slices, which you can grill for 3 to 5 minutes per side. The same goes for other tender vegetables, such as zucchini, eggplant, and mushrooms. As for onions and carrots, grill them for 5 to 6 minutes on each side.
Do you love a good Caesar salad? Wait till you add grilled lettuce to the mix! Yes, you can grill lettuce; 5 minutes on the heat should be enough.
You know what? No one has time to grill their vegetables separately. Instead, chop up your mixed veggies, add oil and spices, and put them in a grill basket to prevent them from slipping through the grill grate gaps. Then, grill the vegetables for 8 to 12 minutes, and move them around.
Steak
The secrets to a steak that’s caramelized on the outside and juicy on the inside are a hot grill and fast cooking. Direct heat is excellent for steak, which is a fancy way of saying you should spread coal evenly at the bottom of the grill. You also want to expose the steaks to high heat and close the lid as much as possible.
When you BBQ steak, leave the heat as high as possible for a medium-well or well-done steak. Then, slightly decrease the heat so as not to burn its surface. Also, you can BBQ the steaks in four positions to get the perfect grill marks. What’s a steak without the mouth-watering grill marks, right?
Burgers
As a type of small meat cut, beef burgers warrant direct heat. If you have a medium heat and a medium burger, it’ll take you 8 to 10 minutes. Watch carefully to avoid burning it, and don’t forget to flip it midway.
Don’t know if you’re using the right amount of heat? We’ve got you. Just place your hand over the grill by four inches. If you pull away less than four or five seconds in, you need less heat.

Additionally, if you’re craving a good old grilled cheeseburger, add some cheese on top in the last minute of cooking. We can already smell it from over here!
Fish
Grilled fish recipes can save your day if you want to cook something up for some last-minute guests, as the high and direct heat for seafood means shorter cooking times. For example, you can BBQ fish fillets and steaks for 3 to 5 minutes per side. Also, you might want to wrap the fish in foil if you don’t want it flaking apart. When it turns opaque, you’ll know it’s done cooking.
As for how to grill salmon, use a cedar plank for an explosion of flavors, and you don’t even need to add much seasoning! Even better, the cedar plank will keep it from falling apart. In 10 to 15 minutes, the salmon will be opaque and ready.

What about shrimp and scallops? You can grill these tiny beauties for 1 to 2 minutes per side. You want shrimp to turn opaque and firm. Also, as long as the shrimp’s flesh is pink, it’s safe to eat.
Ribs
Here’s how to cook BBQ ribs. We recommend indirect heat because they take quite some time. And this coal arrangement cooks the rib’s inside without burning the exterior.
You want to cover the ribs on an oiled rack for at least an hour, an hour and a half, or 2 hours. Be sure to turn it every 30 minutes. And here’s a little hint; you’ll know the meat is done when you twist a ribbon slightly. Is it giving away easily without falling apart? Then, it’s practically begging to be taken off the grill!
Lamb
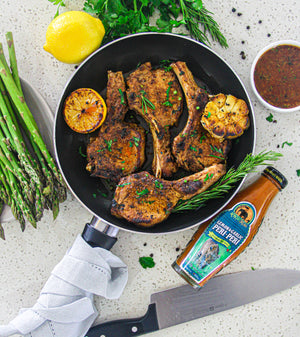
Do you want to know how to BBQ lamb chops? You can BBQ 1/2-inch to 1-inch thick chops for 3 to 4 minutes per side and 1-inch to 1 1/2-inch thick chops for 4 to 6 minutes per side if you like them medium-rare.

Hot Dogs
As a small cut of meat, hot dogs are grilled over high heat for a relatively short time. Still, you might use indirect heat for 25 minutes to get them fully cooked without charring, which is a concern due to the hot dog’s high-fat content.
6. Let It Rest
Do you want to learn how to be a pro griller? Learn when to take the meat off the BBQ and let it rest for 5 to 20 minutes. We may have given you instructions and time ranges, but it’s up to you to decide when it’s ready.
The most critical of our barbecue tips is to remove the meat from the grill before it is overcooked. Place it on a plate that’s warm or at room temperature. This way, its residual heat will cook it even past that point, getting the tissues to relax and the juices to redistribute. Now, you can enjoy juicy and tender BBQed meat! Not to mention, it won’t be too hot to eat.
Remember that you can always put the food back on the heat if it needs more time, but you can’t do anything about an overcooked chicken.
When you’re done cooking, turn off the grill, and give it a clean. Gas grills have control valves and fuel supplies, so you can turn them off. But unlike a gas grill, you’ll have to close the lid and vents of a charcoal grill since there’s no off-switch.
What Is the Proper Way to Grill?
Lump Charcoal vs. Briquettes
Lump charcoal generates higher heat than charcoal briquettes, but it might be a pain in your neck if you want to keep the heat consistent and handle flare-ups. Still, using it is a major charcoal grilling flex! Just stay away from petrol-smelling charcoal. That’s usually a sign the charcoal was made out of accelerator fluid, which will taint the grilling taste, yuck!
Charcoal briquettes are the more beginner-friendly option for charcoal grilling. They’re wood by-products with glue, chemicals, and additives that help them light quickly and burn steadily. So, you can light them with a match. Are you wondering what the catch is? They often burn too hot so even distribution is key.
Other than these two methods, some take their BBQing to the next level by building an open fire and embracing the wilderness!
Final Words
Overall, we hope you’ve found this ultimate guide on how to BBQ like a pro informative. Although this may seem like a lot of information, all you need to do is focus on what concerns you.
Are you gas grilling, charcoal grilling, or so? What type of food do you want to BBQ? Do you like your meat medium-rare, medium, well, or else? This is the first step in how to BBQ, and the second is practice, practice, and more practice!


